How to Go Live on Facebook with Your Business Page
Walk through the steps of live streaming on Facebook with streaming software.
March 26, 2024
Topic tags
Chiara Hoogervorst
Creative
Austin Canary
Content
Want to take your business live on Facebook? You’ve got two options: Do it right from your Facebook page or use a streaming platform. Let’s walk through both!
How to go live on your Facebook page from a computer
- Find the Live video button on your Facebook business page.
- In the Stream setup tab, select Webcam as your video source. (Make sure Facebook has permission to access your camera.)
- Choose the camera and microphone you want to use. A preview of your webcam will pop up in the bottom right corner — give a little wave to test it!
- Add post details (title, description, etc.), decide if you want Facebook to notify your subscribers when you go live, and pick where you want Facebook to post your live stream after it’s over.
- And, finally, hit that Go live button!
How to go live on Facebook with streaming software
If it’s just you and your webcam, going live right from Facebook makes sense. But if you want to broadcast something more professional and polished, like a webinar or a presentation, you’ll want to use a live streaming platform.
A good streaming platform allows multi-camera setups, video switching, screen sharing, and more. And some let you simulcast your live streams to Facebook. All you gotta do is grab the stream key and Real Time Messaging Protocol (RTMP) URL from Facebook and then plug them into your streaming platform.
Here’s how:
- Find the Live video button on your Facebook business page.
- Hit Select on the Go live card.
- In the Stream setup tab, choose Streaming software as your video source.
- Find the stream key and RTMP URL in the Streaming software setup module. (FYI: Your stream key is only valid for your current live stream. You’ll have to do this every time you want to simulcast your live stream to Facebook.)
- Pop over to your streaming software and paste both there.
That’s all! You can go live on your streaming software without having to go back to Facebook to start or stop your live stream.
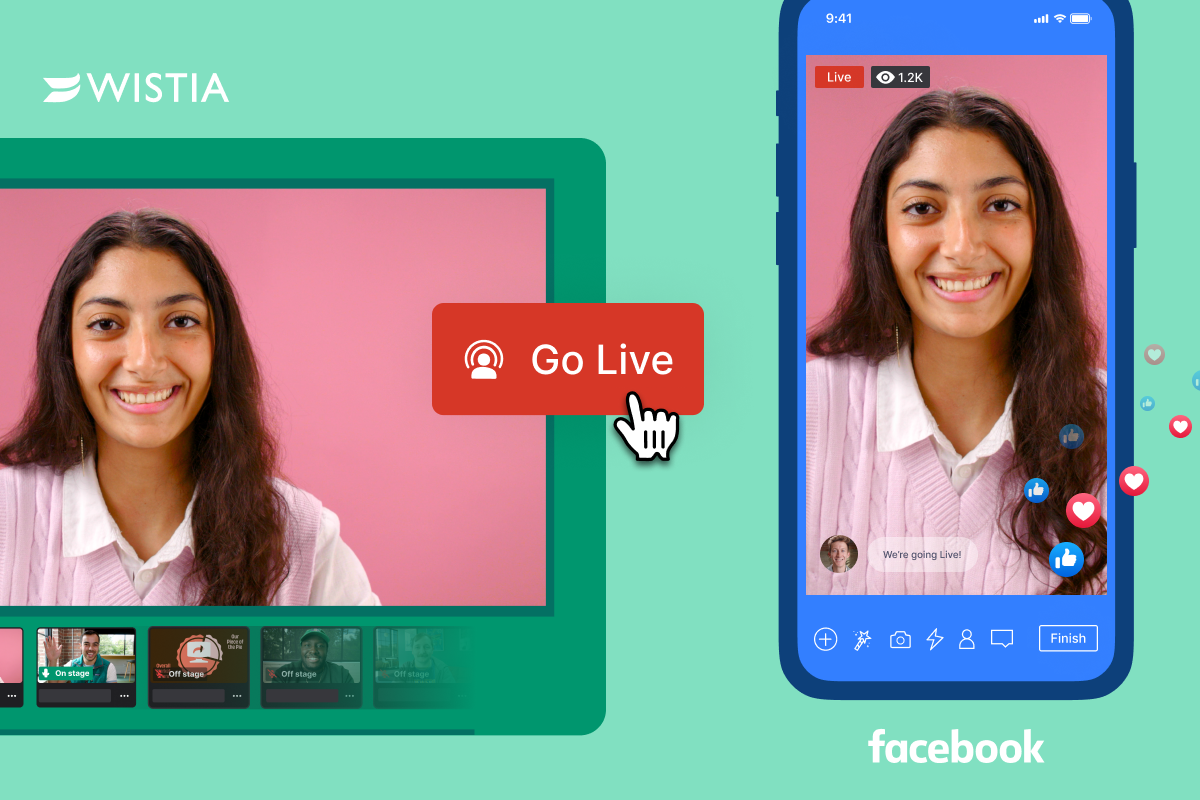
How to simulcast Wistia Live to Facebook Live
Each streaming platform has its own way to add the RTMP URL and stream key. Here’s how you can do it in Wistia Live, our live streaming tool:
- Create a live event in Wistia Live.
- Navigate to the Simulcast option in the left-hand menu of the live event dashboard.
- Paste in the RTMP URL and stream key.
How to save your Facebook live stream recording
Facebook automatically records your live streams and saves them in your Facebook video library. If you want to download a recording, all you gotta do is:
- Hop over to your Facebook page and select Videos in the left-hand menu.
- Find your live stream recording and hit the three dots in the upper right corner.
- Select Download video to save it to your computer.
Sounds pretty simple, eh? But here’s where the real hassle begins: You now have to open the recording in an editing software or upload it into an online video editor if you want to polish it up or repurpose it. And when you’re ready to share it, you’ll have to upload it again to a video hosting platform and/or your social channels.
Wistia Live saves you from all of these steps! Like Facebook, Wistia automatically records your live stream and saves it to your account. Unlike Facebook, Wistia comes with a built-in video editor and sharing tools you can use to edit and share your recording without ever leaving the platform.
Why should I simulcast my Facebook live streams from Wistia Live?
Wistia’s super simple post-stream workflow is only the beginning. We’ve got plenty more reasons to make Wistia Live your go-to streaming platform!
Let’s start with what Wistia Live lets you do during your event. You can bring in up to four panelists, choose the perfect layout, share your screen, and simulcast to up to five social channels at the same time.
Once you end your stream, Wistia automatically saves your recording in your account, where you can fine-tune, share, and repurpose it. And Wistia has more built-in features that’ll help you make the most of your live event recording:
- An AI tool that finds the best parts of your recording and puts these clips into a highlight reel
- Options for who can see your recording
- An email collection form to capture leads directly from your recording
- Integrations with marketing automation platforms to streamline the lead generation process
- Granular video analytics to help you track the performance of your on-demand recording
Host your events with Wistia Live
Ready to deliver polished live streams to your followers on Facebook and easily turn your recordings into marketing assets? Wistia Live is just what you need. Get started today!
