How to Record Your iPhone Screen Like A Pro in 2023
You can record a video of your iPhone screen with nothing more than an iPhone!
September 28, 2023
Topic tags
Need to record an iPhone screen for your next business video? You came to the right place! Whether you’re making a promo or a how-to video or something else, all you gotta do is whip out your new iPhone and start recording — or connect it to a Mac and record your iPhone screen from there.
In this article, we’ll walk you through the recording process for both methods. And we’ll give you some tips on how to edit and share these screen recordings to maximize their impact. So let’s get started!
How to screen record on an iPhone
You’ve got the power to record your iPhone screen right in your phone. To access screen recording, you’ll first need to add that feature to your iPhone’s Control Center.
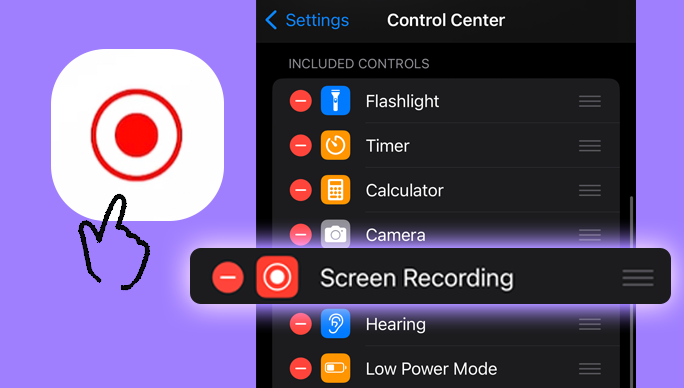
1. Add screen recording to Control Center
Just follow these steps:
- Open up the Settings app.
- Select “Control Center.”
- Tap the “+” icon next to “Screen Recording.”
2. Start the screen recording
And now you can start recording your iPhone screen in a few easy steps:
- Swipe down from the top right of your screen to open the Control Center.
- Tap the screen recording button to start recording. It’ll turn red and start counting down from three.
- When you want to stop recording, tap the red button highlighting the clock in the upper left corner and select “Stop.”
The screen capture of your iPhone will save to your camera roll. You can edit it from your iPhone’s Photos or iMovie app, or more than likely, you’ll want to transfer it to your Mac to get more editing control.
3. Transfer the iPhone screen recording to a Mac
There are several ways to transfer video from your iPhone to Mac, but some will compress your video more than others (looking at you iMessage). There’s good news, though: It’s possible to transfer your recording to a Mac without experiencing any quality loss. Here’s how:
1. Share via AirDrop
AirDrop is a built-in iOS and MacOS feature that allows nearby Apple devices to wirelessly share files with each other. All you need is Wi-Fi and Bluetooth enabled on both devices (no internet connection needed!). To use AirDrop:
- On your iPhone, go to Settings > Photos > Transfer to Mac or PC.
- Select “Keep Originals.”
- Turn on AirDrop on your Mac and allow discovery.
- Open the screen recording on your iPhone.
- Tap “Share.”
- Select AirDrop and tap your Mac device name to start the transfer.
AirDrop is a great solution because it’s faster and more convenient than iCloud, as you don’t need to be connected to the internet. Plus, you’re spared the hassle of having to carry around a USB cable.
2. Import via USB cable
If you want to transfer your videos with a USB cable, follow these steps:
- Connect your iPhone to your Mac with a USB cable.
- Open the Photos app on your Mac and select the import option.
- Select the import destination.
- Tap on “Import Selected.”
This is easily the fastest and most reliable method, as data transfer speeds are much higher with a USB cable.
3. Download from iCloud Photos
You can also upload and download from iCloud Photos, a cloud service for Apple users that automatically backs up all your iPhone photos and videos. As soon as your screen recording is saved to your iPhone’s camera roll, you can access it on your Mac just by logging in to your iCloud account.
iCloud is a convenient way to share videos across devices if you have the time and storage space. And your videos stay securely backed up in the cloud until you decide to delete them.
All-in-one Video Platform
Create, Edit, And Host Videos
How to record your iPhone screen with a Mac
Before Apple rolled out the iPhone’s built-in screen recording feature in 2017, folks would mirror their iPhone screen to their Mac and then record it with QuickTime. You can still do this if you want — and if you’re using macOS Mojave or earlier. Here’s how:
- Connect your iPhone to your Mac with a USB cable.
- Fire up QuickTime Player on your Mac.
- Head to File > “New Movie Recording.”
- Select the arrow beside the record button and choose your iPhone as the source.
- Tap “Record” to begin recording your iPhone screen.
This method saves you the trouble of transferring your screen recordings to your Mac. But it also comes with the constraint of carrying your Mac around and hooking your iPhone up with it to record its screen.
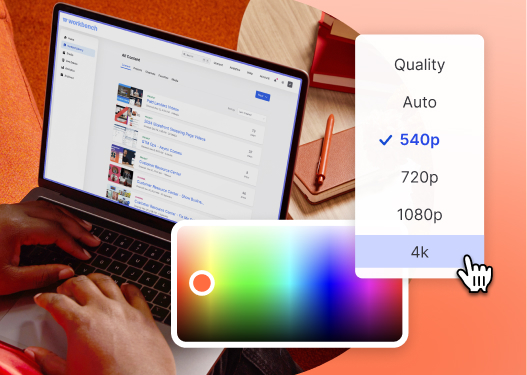
How to edit an iPhone screen capture
With your recording transferred to your Mac, it’s time to bring it to the next level! Open it up in a video editor and polish it up.
Edits you can make to your screen recordings:
- Add a backdrop to turn portrait recordings into landscape videos
- Trim the beginning and end of your recording
- Cut out the unnecessary bits
- Include captions to make your recording more accessible
- Stitch in bumpers
- Include additional B-roll footage to provide context and add variety to your video
- Add transitions to help your video flow more seamlessly
- Add background music
Share your recording
Once you’ve finalized your iPhone screen recording masterpiece, you can upload it to Wistia and embed it directly onto your website.
Using iPhones for business videos
Making high-quality screen recordings is just one of the ways you can use your iPhone for marketing. You can turn your iPhone into a webcam for live streams (with Continuity Camera) and record videos on an iPhone. Forget about fancy webcams and video cameras — the iPhone 15 Pro Max might be all you need!
