

Thinking about making a binge-worthy, episodic video series for your business? Hey, we like where your head's at! After all, a video series is the best way to get more fans for your brand and build affinity. But, before you start planning out your entire show, you need to make sure you have a dedicated space in your office to actually shoot your series.
And while all of the advice we've offered up in this post about setting up a DIY office video studio certainly still applies, there are a few other considerations to keep in mind when it comes to shooting something so episodic in nature. So without further ado, here are some helpful tips for building out a studio for your next video series!
1. Choose the best location in your office
We're not starting off with this tip for no reason—this is one of the most important decisions you can make when building out a studio at your office (a lesson we had to learn the hard way!). If you're thinking about having your studio on the second floor, keep in mind that depending on your building, the folks downstairs might hear you clanking around more than either of you'd like.
Another factor to consider is simply the fact that the roof is literally right above your head (sounds obvious, we know). In our case, when building out the set for Brandwagon, there was very little insulation between our ceiling and the roof of the building, which meant that everything from heavy rain to a helicopter flying by could stop us from shooting.
Whether you're on the first, second, or twentieth floor, try to make sure your studio isn't surrounded by conference rooms that other people will be coming in and out of during the day. And if you can't get around that, we recommend trying to get a ton of shooting done on the same days every week and blocking off those other conference rooms so folks can't use them at that time. Ultimately, you want to be considerate of the other people around you when setting up your studio. Thinking about them in advance of getting set up will also help you work more efficiently in the long run.
Get inspired
2. Make sure your space is super flexible
What kind of series do you plan on shooting? Is it a talk show? Or are you thinking of shooting an unboxing series of some sort? Whatever the case may be, you want to set up your studio in a way that's flexible enough to accommodate multiple shoots and sets for several shows. Even if you're just planning on shooting one series to get started with brand affinity marketing, remember that there's a good chance you'll need to shoot some different segments for your show that may require unique visual assets like different backdrops, props, or even entire sets.
Speaking of set design, when building a studio at your office, think about how you might be able to maintain your show's personality while still being able to reuse the space for different shoots. You can do this by ensuring your set is actually physically movable (put stuff on wheels!) and by creating unique environments that are positioned against blank or simple backdrops.
We've found having one area in the studio that gives us complete flexibility over what can be shot there to be really helpful. Having a blank canvas—seriously, a white wall would work—gives you the flexibility you need to bring in different props and change the lighting and other design elements to accommodate an entirely different show.

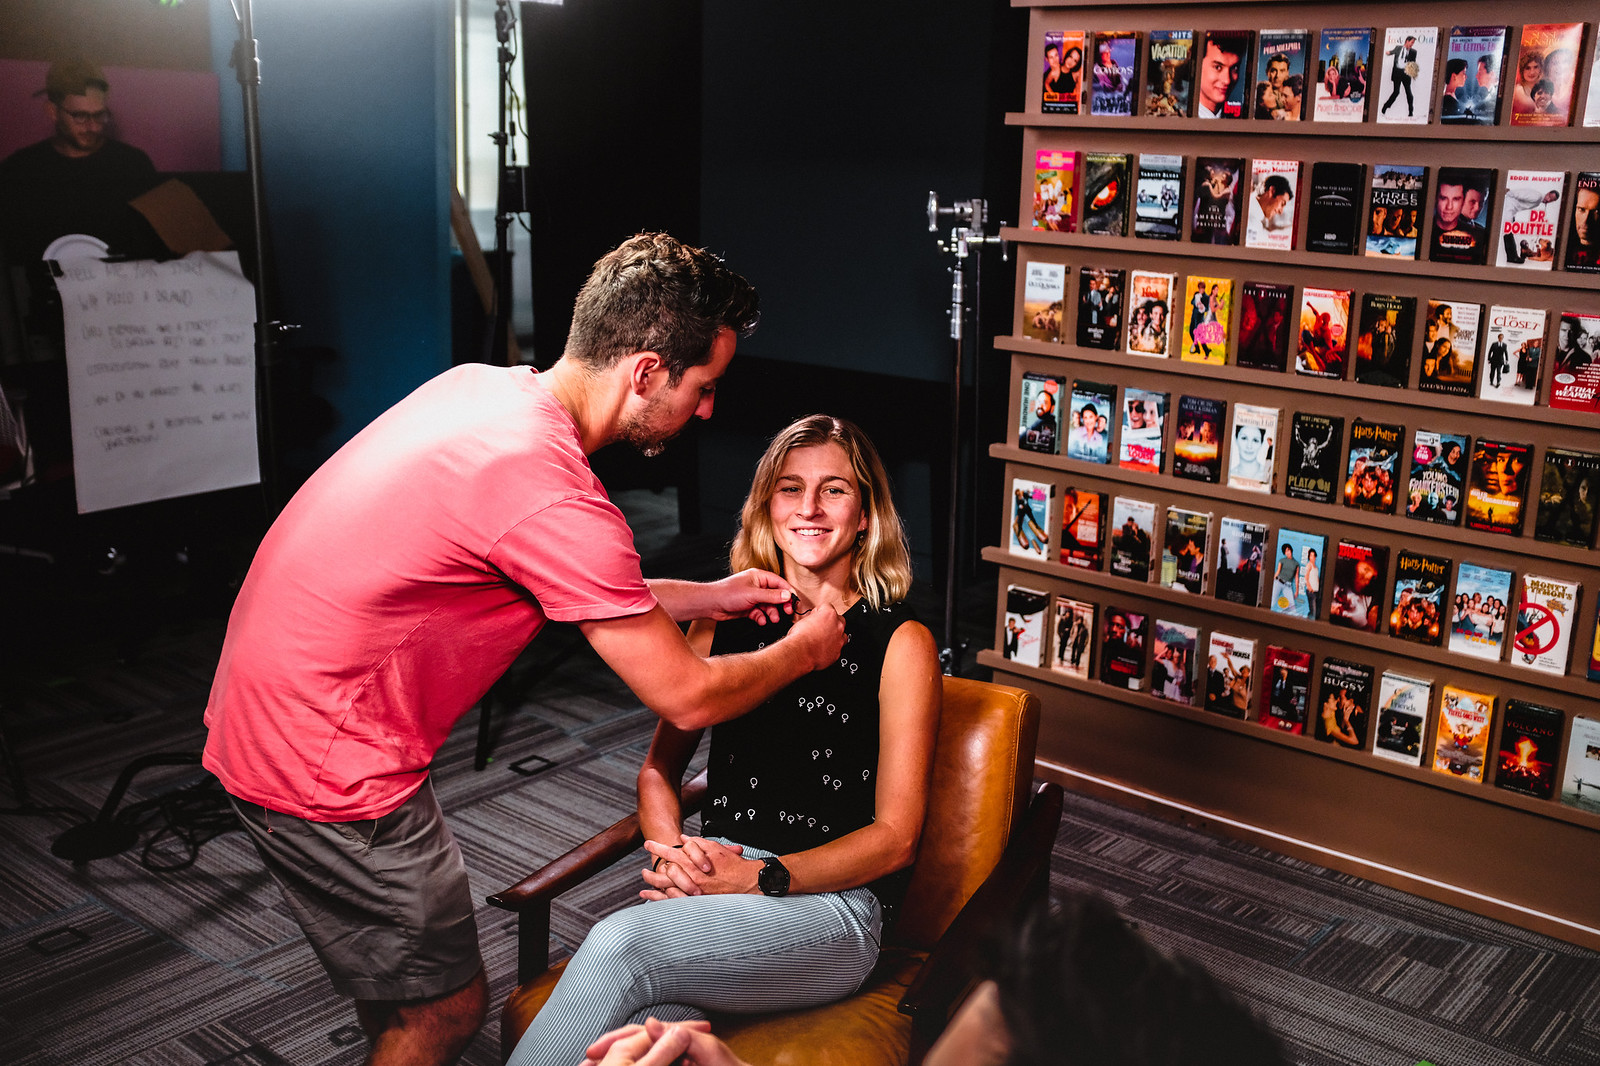
3. Test out your audio setup
Another lesson we learned when creating our new studio was that you should always thoroughly test out your gear in the space before you invest in buying more of it. In the past, we've primarily relied on shotgun microphones for our shoots, but when we were setting up the studio with Brandwagon in mind, we knew we would probably need to invest in some wireless lavalier microphones instead since it was an interview-style show.
Now, lavalier microphones, even when they aren't wireless, can be particularly finicky. But, we didn't realize just how much trouble they cause until we were actually in the studio trying to set them up. Believe it or not, we had some frequency issues with the building that rendered the wireless lav microphones essentially useless. So, the moral of the story is, take the time to test out your audio setup in your space to make sure what you're working with actually...well, works!
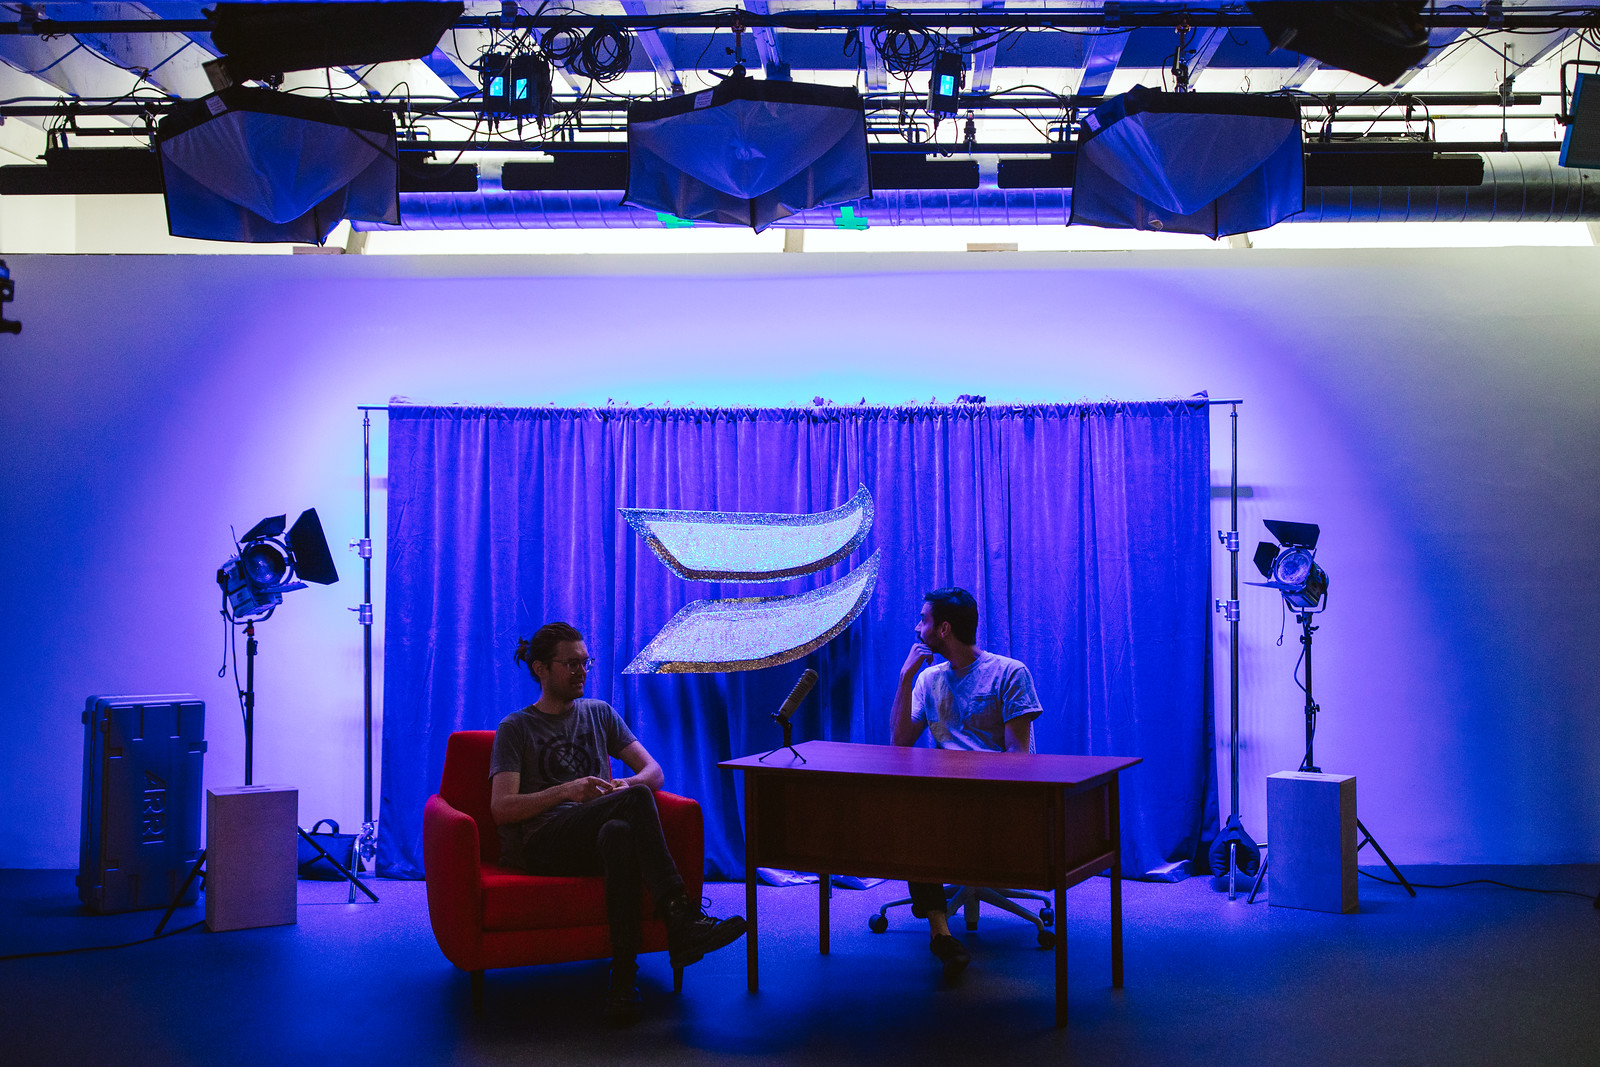
4. Settle on the right lighting rig
When it comes to lighting, there's much to consider, so take your time really thinking through this one. First, ask yourself what your main goals are for your studio. Is ease-of-use more important to you than having a ton of options for various setups? Firm up your answers to these questions, then decide how much of your budget you're willing to spend on lighting. As we've mentioned before, you can get away with a pretty simple lighting setup for less than $100, but the sky's the limit. It all just depends on how much control and flexibility you want over your space.
With the new Wistia studio, we knew we wanted to optimize for creativity and flexibility. That helped us make some important decisions about what kind of setup we should go with. Our classic setup follows a pretty minimalistic philosophy; however, we wanted our shows to feel a bit more elevated and sophisticated. We also wanted to be able to dramatically change the lighting from set to set without taking up too much physical room in the studio with a ton of equipment, so we installed a makeshift grid lighting system that can be controlled by a lighting board. Whatever you decide to go with, be sure to get down on paper what's most important to you and your team before you start whipping out your credit card.
5. Don't forget to buy the basics
Curtains, dividers, and gaff tape. These are really simple purchases that'll make all the difference when setting up your studio. For one, you need to be able to control how much natural light comes into your studio on any given day, so throw some blackout curtains in your shopping cart. Another must-have? Some sort of divider or wall. With a videographer, director, producer, and whoever else in the room when you go to shoot, you want to make sure your on-camera talent doesn't get distracted. Wandering eyes never look great in a shot, so make sure the folks that don't need to interact with the talent can sit somewhere that's out of sight.
We would also be remiss if we didn't give a shout-out to our best friend, gaff tape. Every videographer knows how helpful having gaff tape on-set can be, but when it comes to shooting several video series in the same space, it's an absolute must. Depending on the type of shoot you're doing that day, you might need to move cameras around to the right locations and get your props set up in the appropriate spots, and that's where gaff tape comes in. Mark everything off so you can find the spot, drop the props, and flip the switch.
This is particularly important when you're shooting episodic shows because everything needs to be consistent when you shoot—you want your show to feel seamless from one episode to the next.
6. Make sure you have a "green room" nearby
Typically, when you hear the words “green room,” your mind might conjure up an image of a famous musician sitting before a buffet of Doritos, Evian Water, and hummus with various veggies in the back of some dimly lit club. This isn't far from what we're suggesting here you do here (though that depiction is admittedly a little extreme).
What we are suggesting is that you make sure whoever's on camera has their basic comforts addressed in the space. For instance, when choosing the location for your studio, try to ensure there's a bathroom nearby so people can freshen up quickly before you shoot. Also, make sure you have water readily available and even a few snacks on-hand for long shoots—chances are high that there will be some tummy rumbles on occasion. Regardless of whether your talent is a co-worker or an external guest, you want to make sure everyone is feeling their best when it's time to shoot, so be sure to set up a little area in your space where they can sit and just take a load off.
7. Get scrappy and resourceful
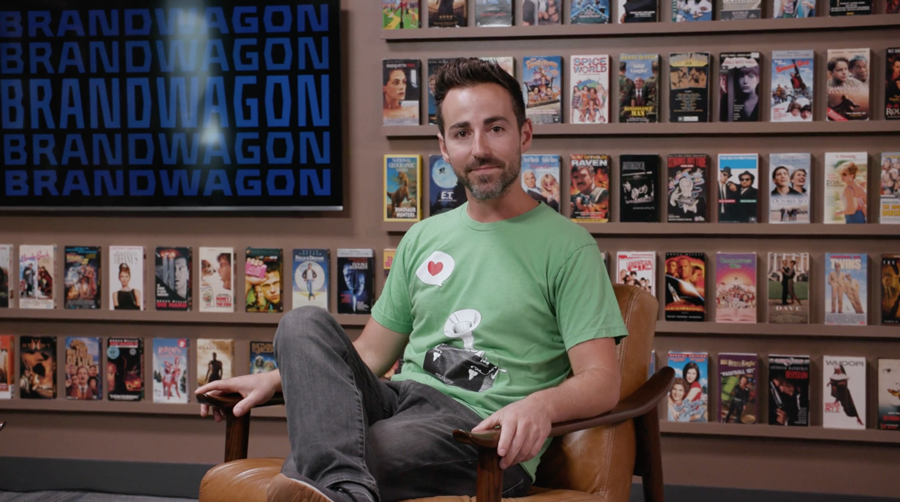
It always pays to be resourceful. Chances are, your budget for this new studio space isn't sky-high, so when in doubt, work with what you have. Before setting up your studio, do an inventory of what you already have at your disposal. You might be surprised to find that you already have ten extra rolls of gaff tape kicking around and some killer props from last year's conference that could be recycled for your studio space. For example, when we made the set for Brandwagon, we knew we wanted to create a VHS wall to add some visual interest to the shot. So, we asked everyone in the office to bring in some old tapes if they had them (and weren't emotionally attached to them), so we could assemble it. Check out the final product—pretty cool, right?
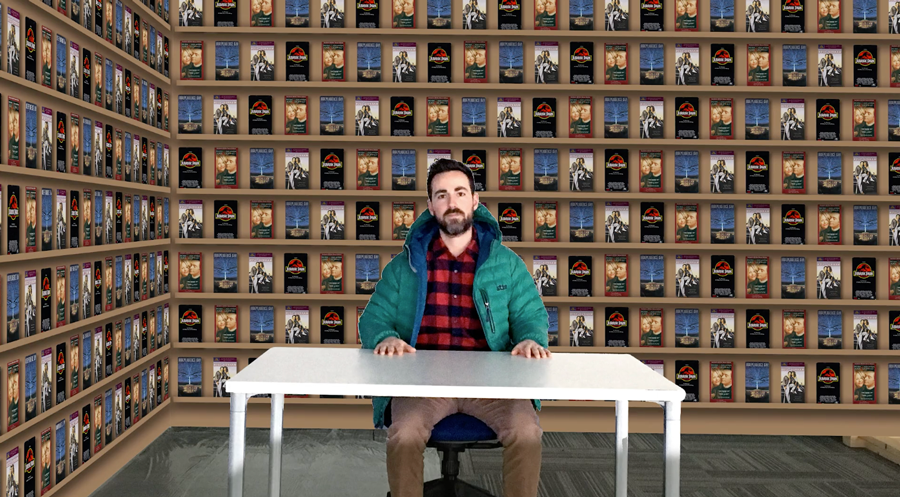
Oh, whoops! That was just a mock-up. Here's how it actually came out:
Here at Wistia, we're big fans of getting scrappy. So in the spirit of DIY, head over to IKEA and get some movable props and materials to build your set, or better yet, go to a second-hand store and see if there's some interesting stuff you can upcycle. If you can get creative about solving some of your studio's problems by asking your team for help and thinking outside the box, you'll save yourself some cash and some headaches along the way.
8. Know your limitations
Are you allowed to tear down that wall? What about that new shag rug you just ordered? Can you really install wall-to-wall carpet at your office? Make sure you have the green-light before you start painting the walls blue. When it comes to building a brand new studio at your office, it's always better to ask for permission up front than beg for forgiveness later.
Another key part of understanding your limitations comes down to budget. We know from personal experience that it's easy to get stars in your eyes over some fancy new gear, but don't blow your budget on something super glamorous that you barely know how to operate. Start small, work with what you know, and then add more gear over time if and when you see fit. Your studio can and should evolve as you shoot more episodes of your series, and chances are, with a few shoots under your belt you'll have a better idea of what you actually need to get the job done!
Get Into Show Business
Learn how to create binge-worthy episodic content with our 20-episode crash course. Watch for free!
Let’s go →