How to Edit Videos Online in Wistia's Video Editor
Trim, split, and delete clips; add background music; and more.
December 4, 2023
Topic tags
If you’re looking for a fast and efficient way to edit videos online, your search ends here — because we just introduced Wistia’s editing feature! It’s an intuitive tool that enables you to trim, split, delete, and create short clips from any video in your Wistia account. And it lets you use smooth transitions to give your videos that extra professional touch, add background music, and find video highlights with artificial intelligence (AI) to make your editing workflow even easier.
Sweet, right?
With this editing feature, you can clean up your recordings, cut out awkward silences, and share the best highlights of your videos with your viewers. The best part? You won’t need to fire up any other video apps or wait for an editor to get back to you (sorry, video editors; we still love you!)
Want to learn how to edit a video right in Wistia? Keep reading.
Using the online video editor
In this section, we’ll walk you through all the steps you need to know to edit videos online in Wistia. In the video below, Chris Lavigne gives an overview and full walkthrough of the editor and best practices to trim clips, add b-roll, and fix mistakes in a snap.
Follow along with the steps below to learn how to use our online video editor.
Open the editor
The first thing you want to do is to open up the All Content page in your Wistia dashboard. Next, select “Edit” in the left-hand side menu, and then choose the video you want to edit. If you already have the video open, you can just pull up the editor from there.
Once you’re in the editor, you can play and pause the video, zoom in and out, and open keyboard shortcuts with the question mark (?) key. Now, we’ll take a look at the different workflows you can perform in the editor.
For this section, we’ll use a webinar recording as our example media that we’ll be editing. Let’s get started!
Trim a video
To trim the beginning of a video, drag the start point to the right until you reach the desired in-point (where you want your video to start). To trim the end of your video, drag the end point to the left in the timeline until you hit the desired out-point (where you want your video to end).
That way, you can trim out the "OK, everyone’s here. Let’s get started!” moment at the beginning of every webinar and the lovely goodbyes at the end.
Split clips
To split your video into multiple clips, move your playhead where you would like the video to be divided, and then select the “Split” button. Now your video clip is split into two clips and you can trim or delete the individual clips.
Thanks to this function, you can easily trim out those false starts and voice cracks that you hope the live audience will forget about when they rewatch the recording. Whew, what a relief, right?
Delete clips
To get rid of a clip in your timeline, select the clip and then press the “Delete” button.
Now you can cut out all that awkward silence during your webinar poll questions and keep the momentum going for your on-demand viewers. Onwards!
Add transitions
If you want to make your videos flow more smoothly, transitions will help you connect two clips without a jerky jump cut.
To get started, hover over the start or end of any clip and you’ll be prompted with the “+” button. You’ll want to click that! Then you’ll have the option to add a transition or more media right there in your timeline.
From here, the properties panel will open, and you can choose your transition style. For now, it’s fade — but there will be more to come.
Add background music
How does royalty-free, royally helpful background music sound to you? Make your videos shine even more by easily adding background music to your business videos.
In the editor, all you have to do is find the “+” button and select “Add background music.” Browse by video type and mood to find the perfect song. And thanks to a nifty technology we’ve coined Smart Tracks, the music you choose will automatically match the length of your video, no matter what adjustments you make to your clips.
We know sourcing and editing music can be a pain. That’s why we’re so excited about this update. Whether you’re creating an engaging product walkthrough or a think piece for LinkedIn, we’ve curated our tracks to help you set the right mood.
All-in-one Video Platform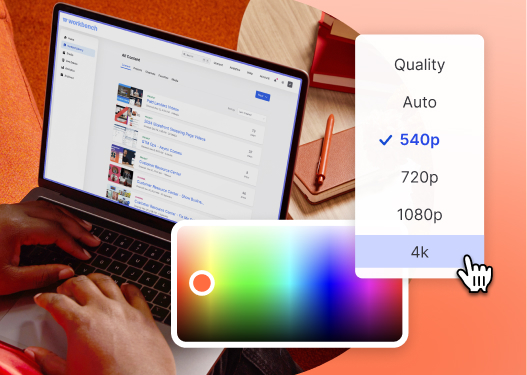
Create, Edit, And Host Videos
Edit clips from the transcript
Learn how you can use the auto-generated transcript of your video to make finding and editing key clips even faster.
Text-based editing
With text-based editing built right into the editor, you can search or scroll through the transcript of your video for key words and phrases. From there you can apply any of the edits we’ve walked through, or you can highlight the block of text in the transcript and delete that clip from the video, or export it to a new draft in the editor.
To view the view transcript, simply use the hotkey “T” or click the “Transcript” button just to the left of the zoom in/out bar.
Create social clips from your transcript
ICYMI, with AI-powered social clips, Wistia creates shareable clips without any manual work. But, what if you already know what part of the conversation you want to share?
Once you’re looking at your social clips, you can simply copy the part of the transcript you want to create into a clip, and voila! A social clip created right from your transcript.
Export a new video
Once you’re done making your picks, you can export and save a copy of your clip in your Wistia account. Just hit the “Save as new video” button at the top right corner of the editor, give it a title, and then choose the Project folder to save it in.
With all your edits in place, you now have a clean, professional video that’s ready to be shared with your audience! Nice work.
What kinds of edits to make to Wistia videos
While you might not be editing the next Super Bowl commercial on our platform, our editing feature offers exactly what you need to make the final touches to your marketing videos.
Trim presentations
One of the most common types of marketing videos to edit in Wistia are presentations. A marketing presentation could be any of the following:
- Webinars
- Tutorials, demos, overviews
- Conference calls, all-hands, or team Zoom meetings
When editing presentations, you might make the following edits:
- Trim the beginning and end
- Cut out dead air
- Cut out mistakes
Making these simple edits is a great way to clean up your presentation before publishing it or sharing it with customers and prospects.
Clean up interviews
If you’re recording interviews, you might be creating some of the following videos as part of your marketing strategy:
- Customer testimonials
- Thought leadership conversations
- Podcasts and high-quality Zoom recordings
When editing this type of content, you’ll want to make sure your edits complement the authenticity of the conversation. So make minimal, thoughtful edits when you can. For example:
- Trim the side chatter at the beginning and end of the interview
- Remove interview questions from testimonials
- Find the best clips to create a segment or highlight reel
Editing an interview in Wistia is a great way to cut out the fluff before sending it out.
Pull clips for social media
With Wistia’s editing feature, you can take long-form video content like presentations and interviews and turn them into short, digestible clips to share on social media.
One way to approach this is to create a highlight reel or teaser video of your long-form video recording. Here are some examples that might get your creative juices flowing:
- Webinar or podcast highlight reel
- Product feature spotlight
- Customer or thought leader soundbites
To make these kinds of video clips, edit your video down to just what you want to feature in that specific promotional video, whether it be key moments for a highlight reel or a focus on a single topic or conversation point. From there, you can trim and arrange your clips to tell the story you want to share on your social channels.
Quickly find video clips
Now in Wistia, all users (even Free) have access to social clips powered by AI. This feature analyzes transcripts from webinars, interviews, lectures, and more to identify the most engaging and impactful parts of your videos.
Getting started is super easy. Just upload your video and select "Social Clips” from your media page. Let artificial intelligence do the heavy lifting to comb through your content. Then watch as Wistia generates concise clips of the best moments.
Once you’ve chosen your clip,trim up the start and end, cut out anything you don’t want, and then share that clip directly on social media or embed it on your website. We also generate titles and descriptions for your clips. Pretty neat, huh?
Online video editing made simple
Editing videos online with Wistia is pretty straightforward. You can learn how to trim a webinar on your own in just seconds. It’ll save you and your video team a lot of time between completing the live event and getting the recording sent out to registrants. And you can make cuts to a video, use just parts of a video, make promo videos, and more without needing to use complicated video editing software.
